Spring Garage Door Maintenance Checklist
Spring is here, and it’s the perfect time to give your garage door some much-needed attention. While often overlooked, your garage door is a vital part of your home. Regular maintenance not only ensures smooth operation but also extends the life of your garage door and keeps your family safe. The good news? Tackling a spring garage door check is simpler than you think!
This guide walks you through a step-by-step maintenance checklist to keep your garage door in top shape. From identifying wear and tear to testing safety sensors, follow along to make sure your garage door is ready for the season ahead.
Start with a Visual Inspection
The first step in any maintenance routine is a thorough look-over. A visual inspection helps you quickly identify signs of wear and tear before they cause big headaches. Here’s what to focus on:
Checklist for Visual Inspection
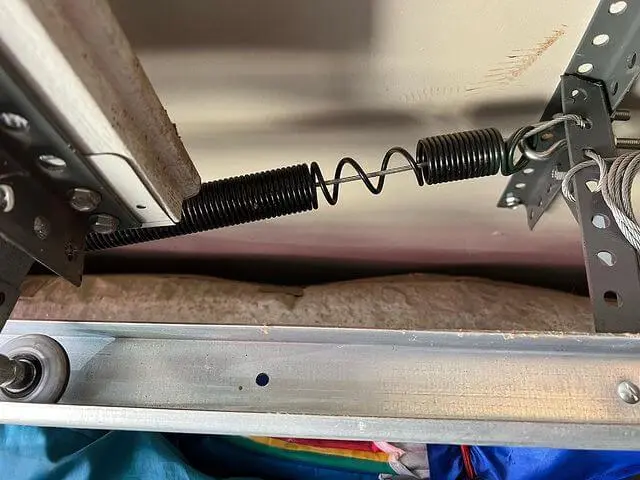
Look for Rust, Damage, and Wear
Rust can weaken metal parts, leading to eventual breakdown. Inspect the tracks and door panels for rust spots or dents that could affect functionality.
Inspect Cables, Rollers, and Hinges
These moving components experience the most wear. Look closely for frayed cables, cracked rollers, or loose hinges. Damaged cables are a safety risk and should be handled by a professional, while worn rollers can be replaced with minimal effort.
Tip: A flashlight can help you spot small cracks or damage you might otherwise miss.
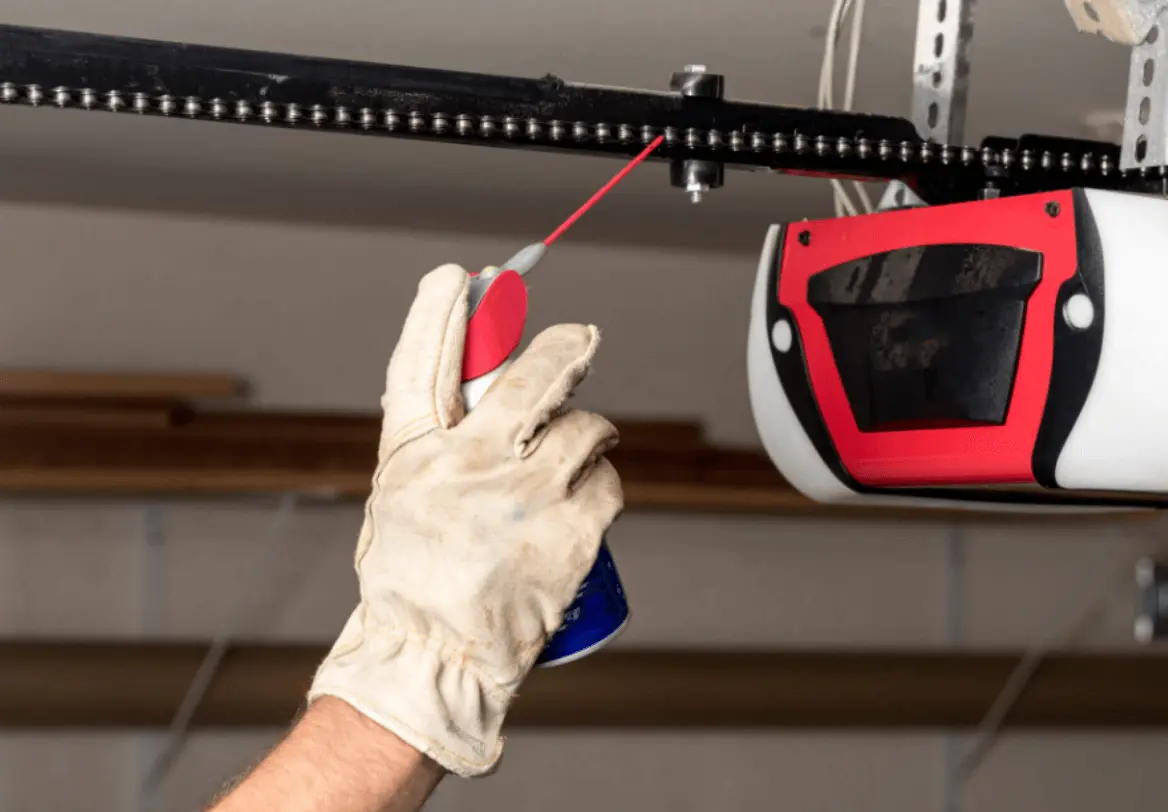
Lubrication is Key
Without proper lubrication, parts of your garage door could grind together, increasing friction, noise, and wear. A quick lubrication routine can save you from costly repairs down the road.
Which Lubricants Should You Use?
- Best Options: Look for silicone-based or lithium-based spray lubricants. Avoid WD-40, as it’s more of a cleaner than a lubricant.
- Pro Tip: Choose a lubricant specifically designed for garage doors to ensure long-lasting quality.
How to Lubricate Moving Parts
- Clean First: Wipe down parts with a clean, dry cloth to remove dirt or debris.
- Apply Lubricant: Spray lubricant on the following parts:
- Tracks (lightly)
- Rollers
- Hinges
- Springs
- Test the Door: Open and close the door a few times to distribute the lubricant evenly.
Warning: Keep lubricant away from plastic or rubber parts (like weather stripping), as it can cause degradation over time.
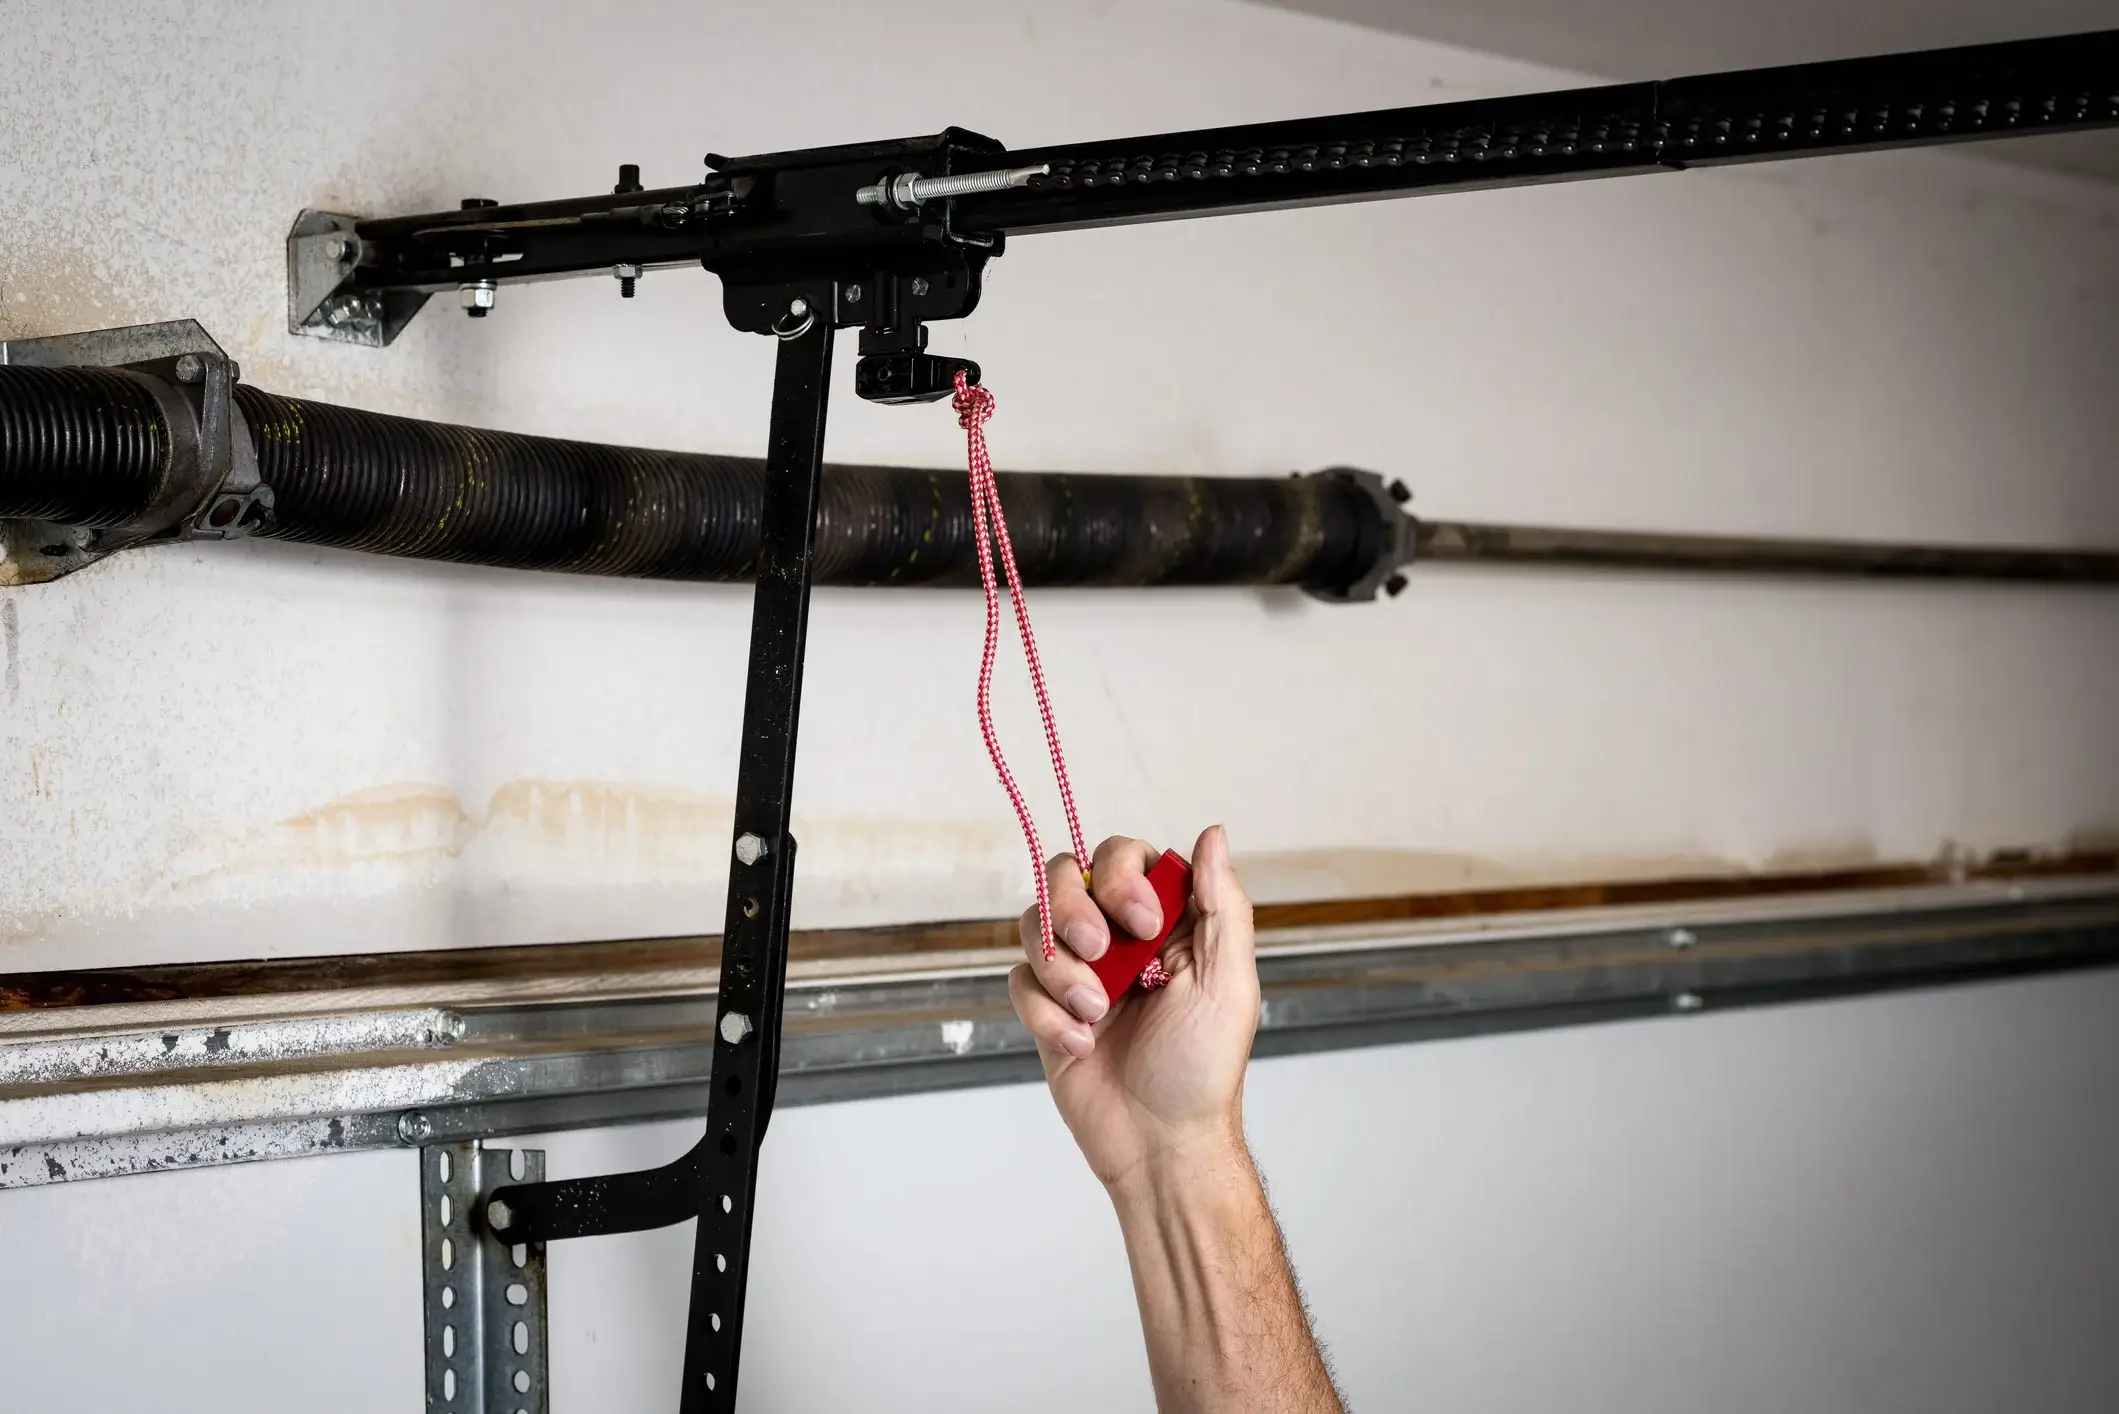
Perform a Balance Test
An imbalanced garage door can strain the opener and compromise safety. Spring tension is what keeps the door balanced, and testing this is a must during seasonal maintenance.
Why is Balance Important?
If your door feels heavy or shifts unevenly when manually raised, it could indicate issues with the springs.
How to Perform a Balance Test
- Disconnect the Opener: Pull the red emergency release cord to disconnect the motorized system.
- Lift the Door by Hand: Raise the door halfway and leave it. A properly balanced door will stay in place.
- Evaluate Results:
- If the door falls shut or springs upward, it’s out of balance. This could mean the springs need adjustment.
- Contact us for spring-related issues—they can be dangerous to handle yourself.
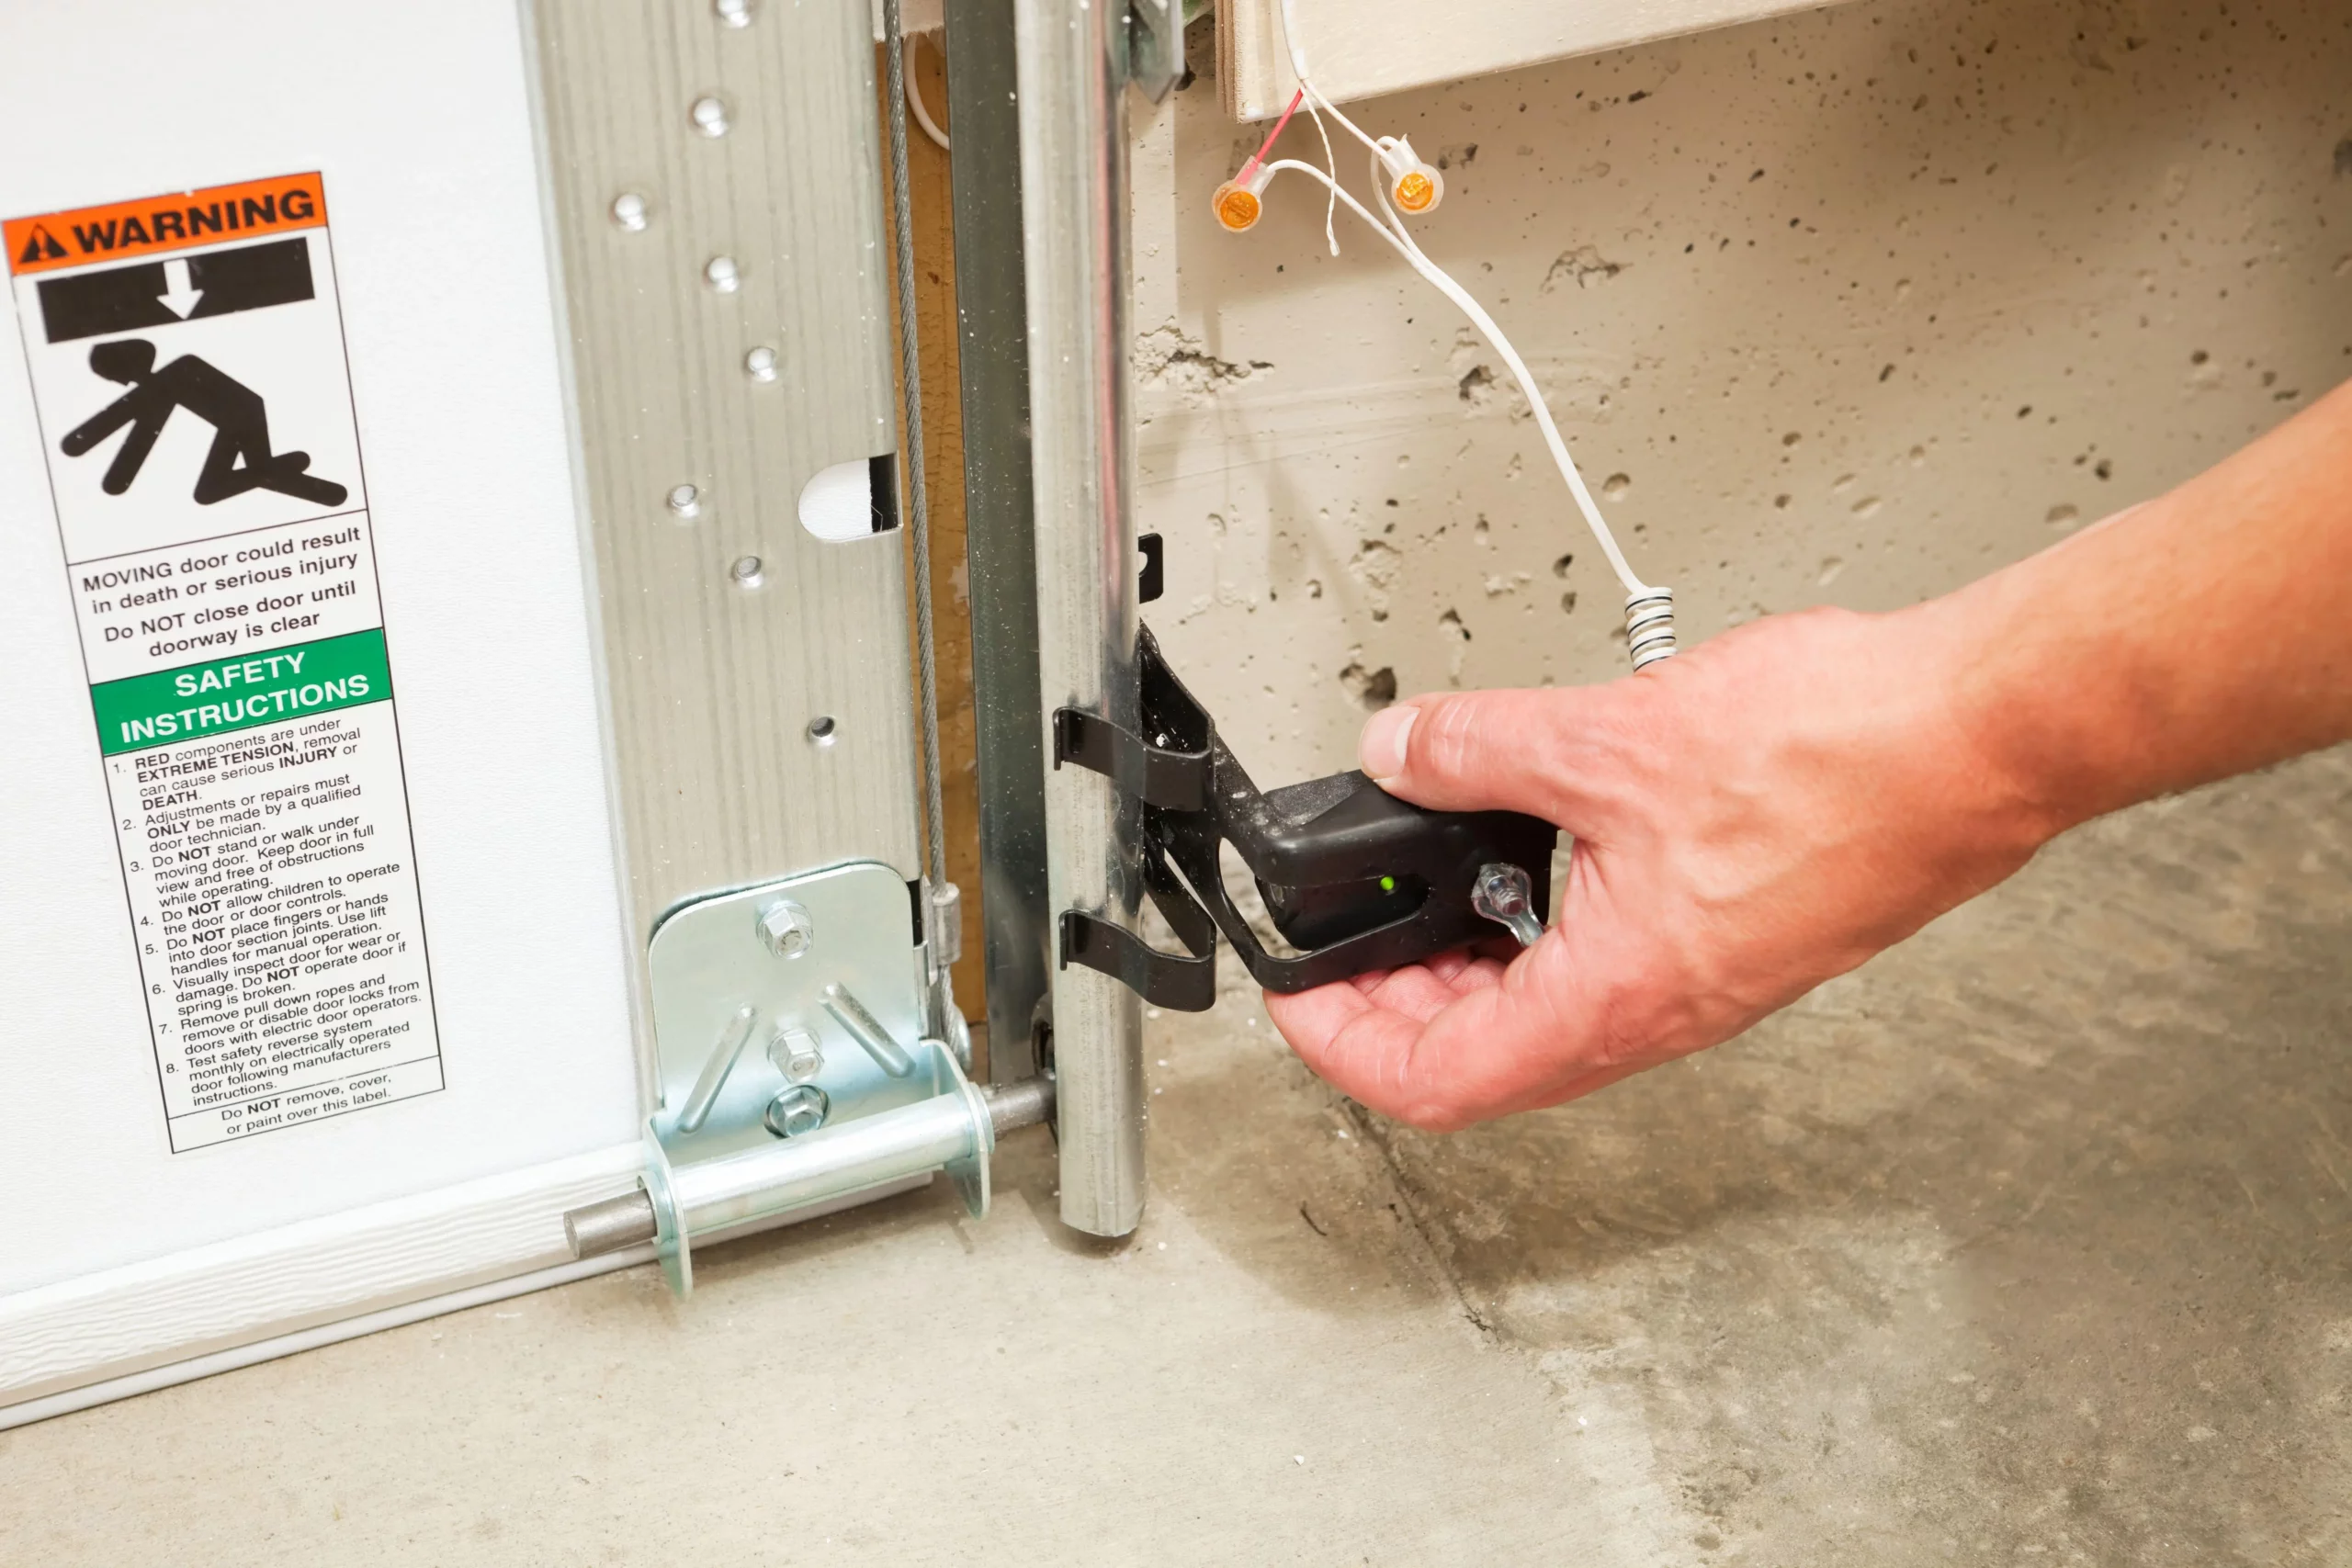
Check Your Garage Door Safety Sensors
Safety sensors are a critical part of modern garage doors, preventing accidents by stopping the door from closing if something is in the way. A quick test will ensure these sensors are working as intended.
How to Test Sensor Alignment and Functionality
- Inspect the Sensors: Locate the infrared sensors near the bottom of each track. Ensure they are clean and aligned properly.
- Test with an Object: Place an object (like a cardboard box) in the door’s path and try to close it.
- If the door reverses upon contact or detects the object, you’re in good shape.
- If not, the sensors may need realignment or replacement.
Troubleshooting Sensor Issues
- Clean the Lenses: Dust or debris on the sensor lenses can prevent proper functionality.
- Check the Wiring: Make sure the wires connecting the sensors aren’t frayed or disconnected.
- Realign Sensors: Adjust the angle of the sensors until the alignment light stays solid.
If the problem persists, it might be time to consult one of our professional garage door repair technicians for help.
Why Regular Maintenance Matters
Routine maintenance isn’t just about avoiding emergencies—it’s about enhancing safety, convenience, and the lifespan of your garage door. Here are a few key benefits to staying on top of it:
- Save on Repairs: Catching small issues early prevents costly breakdowns later.
- Improve Safety: A well-maintained door reduces risks, such as snapped cables or faulty sensors.
- Extend Door Lifespan: Lubrication and balance checks keep your system running smoothly for years.
When to Call a Professional
While many tasks can be done on your own, some issues – like spring replacement or extensive damage, require expert assistance. If something feels beyond your comfort level, don’t hesitate to reach out to us.
By following this spring maintenance checklist, you’ll keep your garage door in top shape and working reliably throughout the year.